
🧩 1.1 Run the Demo#
🔰 Tutorial#
Learn how to build a Closed-loop Spectroscopy Lab: Light-mixing Demo (CLSLab:Light) to perform color matching via RGB LEDs and a light sensor for under 100 USD and less than an hour of setup. The tutorial covers ordering parts, verifying prerequisites, software setup, sensor mounting, testing, and an optimization algorithm comparison tutorial. We use secure IoT-style communication via MQTT, MicroPython firmware on a pre-soldered Pico W microcontroller, and the self-driving-lab-demo Python package.
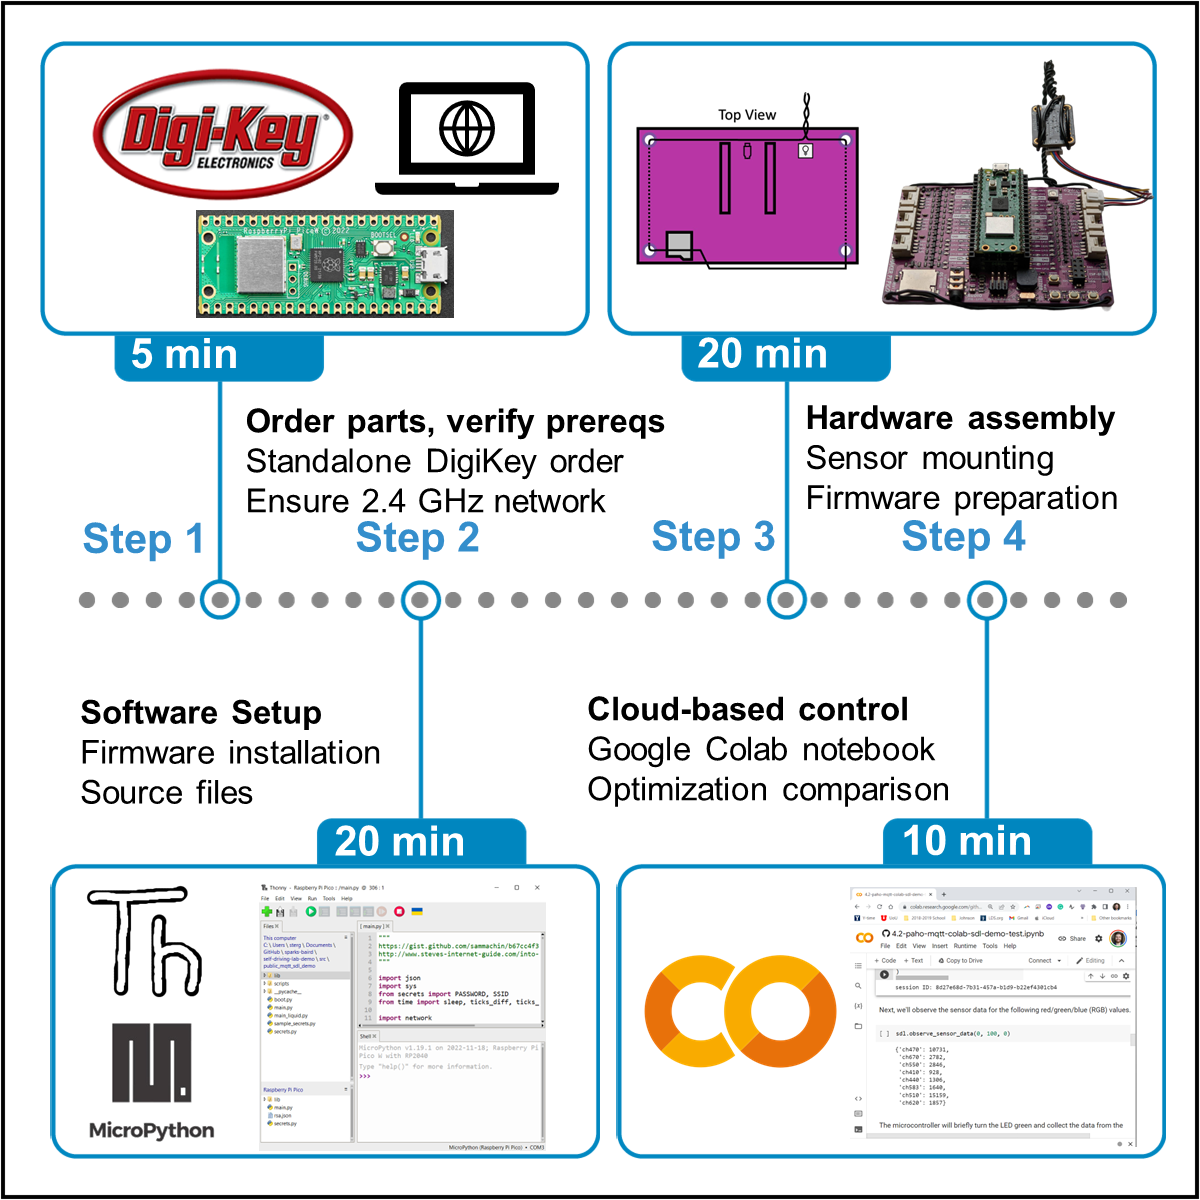
Setting up the CLSLab:Light “Hello World” demo. The workflow takes approximately one hour to complete using pre-made software components. Licensed under CC-BY license from: 10.1016/j.xpro.2023.102329
Hardware and WiFi Requirements#
Warning
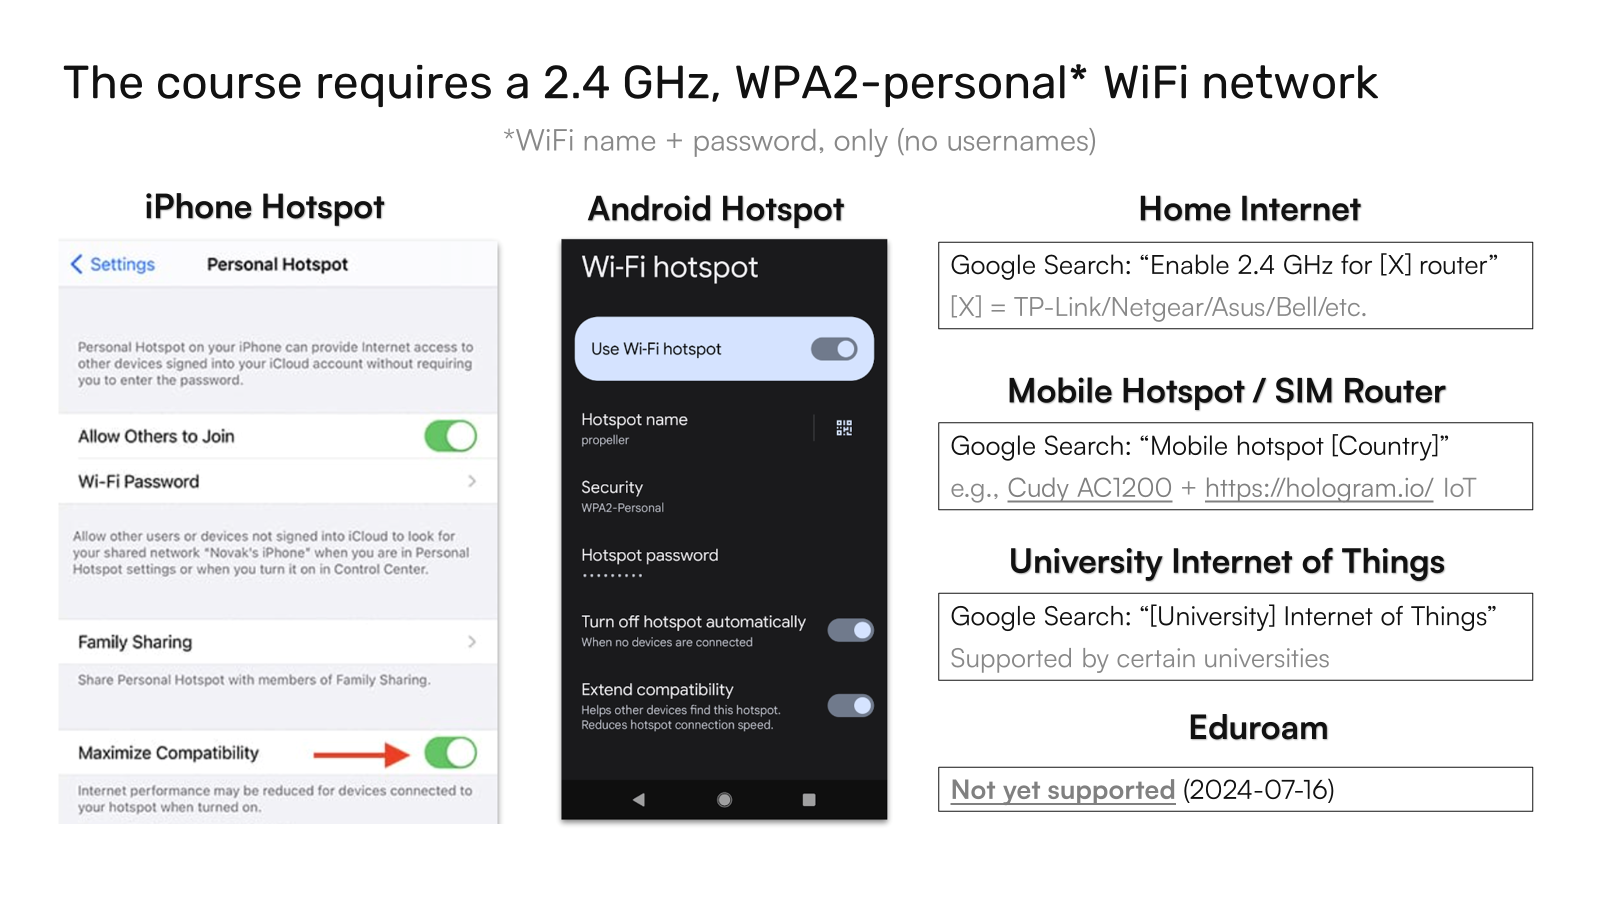
This course requires physical hardware and a 2.4 GHz WPA2-Personal wireless network
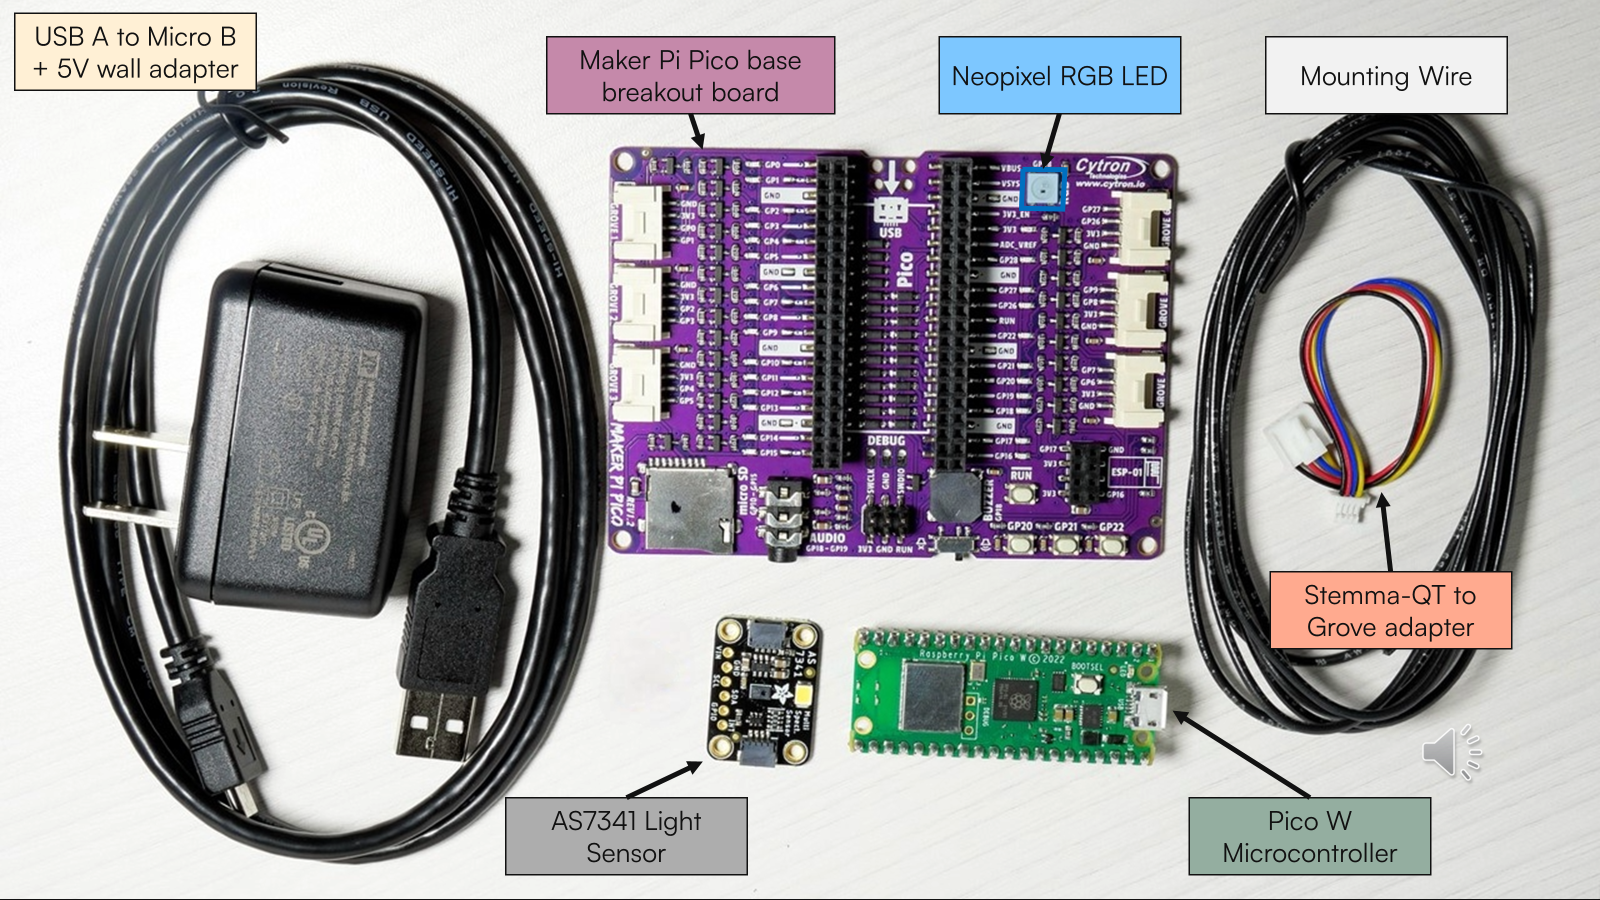
If you do not have the hardware, you will need to purchase the required components, replacing the USB power adapter with the correct style for your country (e.g., European type C), if necessary. You may also refer to “Before you Begin”.
Tip
If the AS7341 sensor shows as being on backorder, you can either order it from DigiKey still and wait until it comes back in stock or source it from another supplier (see e.g., Adafruit’s listing, Mouser). If you have trouble accessing the DigiKey cart, see the CSV version of the cart [permalink].
You will need access to a 2.4 GHz WPA2-personal wireless network (i.e., WiFi name and password only, without usernames, which is required for most internet-of-things devices). If you do not already have access to one, some alternatives include setting up a home network to broadcast both 2.4 GHz and 5 GHz networks per your router’s specific instructions, or perhaps easier - using a mobile hotspot in extended compatibility mode. Likewise, you may also use a SIM-enabled router or check if your organization supports IoT devices. Eduroam is not yet supported as of 2024-07-16. See additional recommendations for gaining access to the required network.
Tip
If you need a quick solution that can be standalone and dedicated, we have tested the Cudy AC1200 SIM-enabled Router with a Hologram IoT SIM Card and pay-as-you-go plan, though pay-as-you-go data is expensive at US$100/GB (US$0.10/MB) and intended for low-bandwidth data transfer.
Video Tutorial#
✅ Follow the video tutorial below. Consider printing a hardcopy of the Build Instructions manuscript or opening it in a separate tab.
Warning
You must copy the hivemq-com-chain.der file to the Pico W for it to work with recent version of the self-driving-lab-demo package. If you swapped out the credentials with your own broker information (required for the assignment), you must generate your own hivemq-com-chain.der file due to a recent change in HiveMQ’s security procedures (as of 2024-07-03).
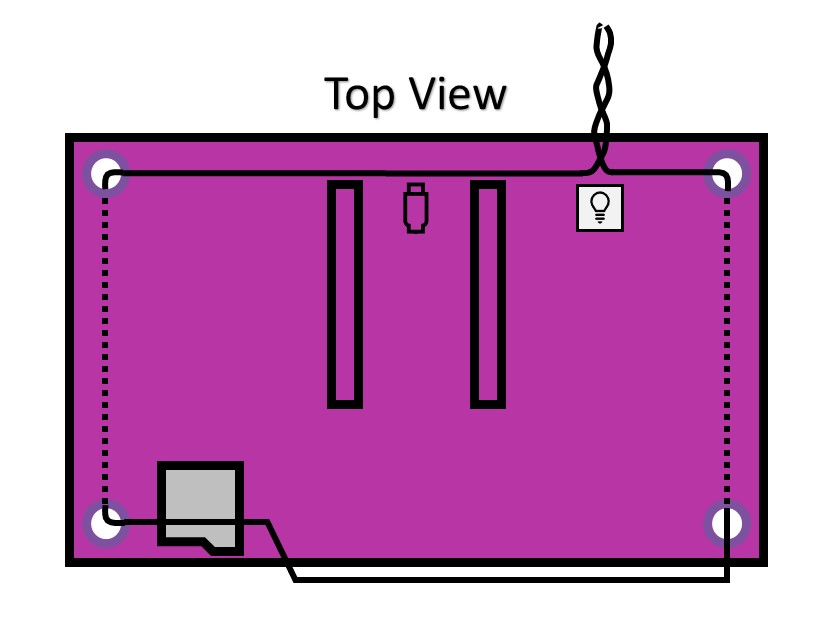
Figure 3 from the build instruction manuscript is copied below for convenience:
Tip
While Thonny makes it very easy to install MicroPython and provides a beginner-friendly integrated development environment (IDE), users may prefer to use the MicroPico extension in VS Code for actual code development after installing MicroPython via Thonny or through the corresponding UF2 file. Combined with cloning your GitHub assignment repo locally, this can allow for a very streamlined experience. While the MicroPico extension is overall very nice, sometimes it can be more finicky than Thonny. If you run into issues, one troubleshooting step you may take is to check against how it runs in Thonny.
Additional Resources#
For some additional context about the motivation of these demos, read What is a minimal working example for a self-driving laboratory? at 🔗 DOI: 10.1016/j.matt.2022.11.007 or by clicking the image below:
Note
A static PDF copy is also available at ac-microcourses
🚀 Quiz#
📄 Assignment#
A partial walkthrough of the assignment is shown below. If you get stuck, refer back to the build instructions manuscript and the AC Microcourses Hello World GitHub discussions.